
Online Privacy 101
A practical, open-source guide to protect yourself online
This is an open-source project. Click here to contribute.
Step 1: Use a password manager
This step is the most essential because it makes all the other steps easier. Sign up for a password manager. According to internet expert Paul Jarvis, here's what you should look for in a password manager:
- End-to-end encryption. This means the software that stores your passwords encrypts your data. Even if the password manager is hacked, your data is safe.
- Easy 2-factor authentication through the password manager.
- Alerts if any of your accounts have been hacked.
- Bonuses: Virtual Private Network (VPN), browser plugin that will auto-fill passwords, import/export passwords from your browser, auto-generate strong passwords.
There are a lot of options: 1Password, LastPass, Dashlane, RememBear, and many, many more. Myki, another option, saves your passwords offline (no cloud). I personally use Dashlane and love it. (I'm not an affiliate or partner!)
The good news is most of the options I listed have a free tier with limited features. If you can afford the ~$30-50/year for 1Password, Dashlane, etc., I highly recommend forking over the cash.
Transfer all your passwords to your shiny new password manager!
Where have you been storing your passwords? The browser? Apple keychain? Old-fashioned paper notebook? Wherever it may be, it's time to transfer all of that information to your password manager. There are 3 many ways to transfer your passwords:
- Import/export. LastPass and Dashlane let you import passwords from a number of browsers. This is the easiest way by far to get started. If you’re using a Mac, you might also have your login info stored in Apple’s Keychain application; export your data using the guide here.
- As you browse. Most password managers with a browser plugin will prompt you to add login information as you go about your business normally.
- Manually. Tedious, but effective.
Here are guides for where to find your passwords in Chrome, Safari, Firefox, and Internet Explorer.
Once you've transferred your data to your password manager, it's time to remove that data from wherever it was previously stored. This means you need to delete your passwords from your browser and turn off the browser preference to store this information. It's up to your password manager to take care of this from now on!
Step 2: Change your most important passwords
Once you've set up your password manager, it's time to start changing your passwords. This can be intimidating and time-consuming, but don't let it keep you from taking action! I recommend changing your top 5 most used accounts immediately, and then gradually changing the rest whenever you log onto those sites. Here are the accounts I recommend changing right now:
- Email accounts (Google, Outlook, iCloud, Yahoo, Hotmail, etc.)
- Document storage (Dropbox, etc.)
- Bank & credit card accounts
- Money transfer apps (PayPal, Venmo, CashApp)
- Amazon
- Social media accounts (Facebook, Instagram, Twitter, Snapchat, TikTok, etc.)
How can you make sure your newly created passwords are unique and secure? Oftentimes, your password manager comes with this feature built-in. With Dashlane, I'm prompted to "Generate a strong password" whenever I create a new password or change an existing one. In the past I've used this free strong password generator.
However you generate your passwords, make sure they're different for each and every account.
Step 3: Set up two-factor authentication everywhere you can
Two-factor authentication is a process that gives web services secondary access to the account owner (you) in order to verify a login attempt.
While you're in the process of changing your passwords, take a couple extra minutes to set up two-factor authentication for your most critical accounts. Here's a helpful site to search if you're wondering whether or not two-factor authentication is available for your account and how to set it up.
Download a mobile authenticator app
While most apps support two-factor authentication via text message, the more secure option is to use an authenticator app. In addition, authenticator apps offer flexibility when you are traveling to a place without cellular service. Popular options include Authy, Google Authenticator, Microsoft Authenticator, or HDE OTP (iOS only).
Save secret keys in your password manager
While enabling two-factor authentication, you will likely be prompted with several "secret keys" to copy and save. These codes can be used to access your account as a last-resort if you are unable to access your mobile device. I save my secret keys in Dashlane in the "Notes" section of the account they're associated with.
Step 4: Strip down privacy settings
Below are five accounts that I recommend digging into to change your privacy settings. With most of these services you can choose to opt out of certain types of data collection. Follow the links and read the fine print.
- Manage your data in your account dashboard
- Protect yourself against Google legally tracking you by opting out of the data they are able to collect.
- Turn off ad personalization
YouTube
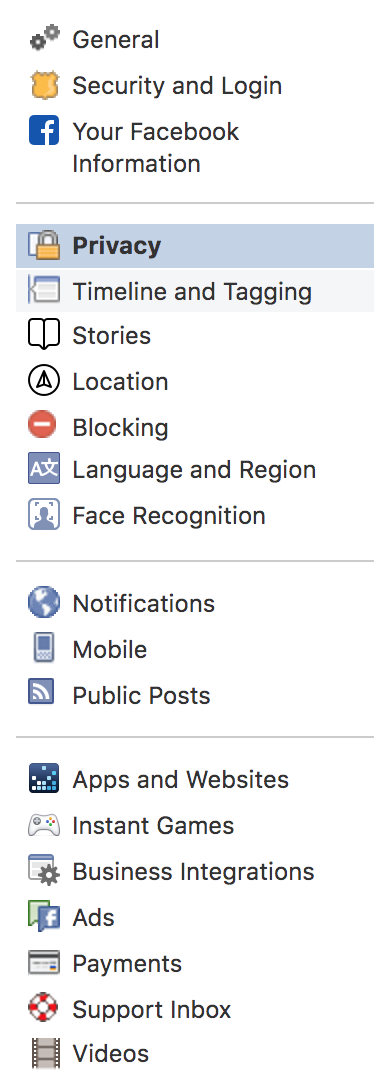
My hard & fast recommendation is to delete your Facebook account entirely. However, if you need to keep your account, you can lock down your data in your settings panel. Facebook has made it easier to control your privacy settings in recent years, but there are still multiple places to edit this information. I recommend navigating to settings, and editing your privacy controls in every panel on the left-hand side of the screen.
- Personalize your privacy & security settings
- Check your login activity
- Revoke access to third party apps that should no longer have access to your instagram account
Amazon
Step 5: Start using a VPN when accessing unfamiliar wifi networks
Truthfully, this is where my knowledge about security and online privacy starts to diminish. I've never used a VPN until recently, and it's only because Dashlane provides one with my paid account. Here's Dashlane's take on why and when you might want to use a VPN:
What is a VPN? As its name suggests, a Virtual Private Network is about privacy. It creates a network, or a closed system of communication between you and the VPN provider. And that network is virtual because, unlike a "real" network, there is no preexisting, dedicated infrastructure.
Why should I use a VPN? In many cases, your access to the internet, be it at home or at work, is safe and secure. But when you're on the move and use free or unfamiliar networks such as in airports, hotels or cafes, you're opening yourself up to your data being observed and potentially stolen. This is especially true if you visit web addresses using “http”, not “https”, or access an email account using unsafe protocols. A VPN allows you to go online through a secure connection even when you're on an insecure network. When you're on the internet, you're anything but anonymous. Your IP address is public information, and locates you geographically. Using a VPN means that your internet traffic is routed through the VPN provider. So instead of your own IP address, your traffic now reaches the internet from the location of the VPN's server. Additionally, your service provider cannot see what websites you're visiting, since the traffic through the VPN is encrypted.
Like password managers, there are many options when it comes to VPN providers including NordVPN, Surfshark, PrivateVPN, ProtonVPN, and many more. It's generally recommended that you don't use a free VPN service, as they may be monetizing your connection in other ways.
Here's an article recently published by The Verge that describes in detail how to set up a VPN on your computer or mobile device.
Step 6: Use a private web browser (Firefox)
Firefox is dedicated to user privacy and build a suite of products to back up that promise. Download Firefox browser here.
Step 7: Use a private search engine (DuckDuckGo)
Google tracks you, DuckDuckGo doesn't. Here's an excerpt from DuckDuckGo's website:
To keep your searches private and out of data profiles, the government, and other legal requests, you need to use DuckDuckGo. We don't track you at all, regardless what browsing mode you are in. Each time you search on DuckDuckGo, it's as if you've never been there before.
Step 8: Use burner email accounts
Just like it's important to change your passwords regularly, you can add an extra layer of security (and avoid phishing attempts) by changing up your email accounts. In addition, you can choose to use a fake name and identifying information when registering for email accounts. This is legal and you should do it to avoid having your data mined across services.
If you really want to avoid any info from a website, you can use a service like Temp Mail, Maildrop, or Mailsac to create fake email addresses. These temporary inbox services will only hold emails for a small period of time (anywhere between 10 minutes to a week). — Natt Garun, The Verge
Step 9: Update software regularly
Software updates are important because they often include critical patches to security holes. The next time your desktop or mobile device prompts you with a software update, do it as soon as possible.
The extra mile
- Sign up for a private email address from ProtonMail which is encrypted end-to-end and isn't tracked by Google.
- Delete emails you no longer need.
- Delete online accounts you no longer use. This is more difficult than it seems, as many providers do not allow you to delete your account, even if you make a customer support request. However, you will find the option to "Delete your account" within some applications, and you should do so if you no longer need the account.
- Turn off all location-based permissions on your phone.
- Use private messaging apps with end-to-end encryption like Signal or Telegram.
- Change your passwords every 6 months.
- Regularly delete old photos and posts from social media. Hackers can use identifying information in photos to gain access to your online accounts.
Thanks to Paul Jarvis for inspiring much of this content via his Privacy Challenge email newsletter series and Twitter user @somenerdliam for this helpful thread on how to remove your digital footprint from the internet.